
There’s nothing quite like a warm, buttery scone fresh out of the oven. But when you add a burst of citrusy orange and rich cream? Absolute perfection! 🍊✨
If you love the idea of a fluffy, soft, and flavorful scone, then you’re in for a treat. This Orange Cream Scones recipe is easy to make, ultra-tender, and bursting with fresh orange zest. It’s the perfect balance of buttery richness and citrusy brightness, making every bite irresistible.
So, whether you’re planning a cozy breakfast, a fancy brunch, or just a delightful afternoon snack, these Orange Cream Scones will be your new favorite treat. Let’s dive in!
Table of Contents
Why You’ll Love These Orange Cream Scones

What makes these Orange Cream Scones truly special? A few game-changing details:
✅ Melt-in-your-mouth texture – Thanks to heavy cream and cold butter, these scones are soft, not dry!
✅ Bright citrus flavor – Fresh orange zest and juice add a naturally sweet, tangy kick.
✅ No fancy ingredients – You probably have everything in your kitchen already!
✅ Easy to make – No mixers, no complicated steps. Just mix, shape, and bake.
✅ Versatile – Enjoy them plain, add a sweet glaze, or mix in your favorite add-ins.
Ingredients You’ll Need
Before we get started, let’s talk about the simple yet essential ingredients that make these Orange Cream Scones so special.
Dry Ingredients
- 2 ½ cups all-purpose flour – The base for the perfect scone texture.
- ¼ cup granulated sugar – Just enough sweetness without overpowering.
- 1 tablespoon baking powder – Helps create those flaky layers.
- ½ teaspoon salt – Balances the flavors beautifully.
Wet Ingredients
- ½ cup cold unsalted butter (cut into small cubes) – The key to flaky, buttery scones!
- ¾ cup heavy cream – Keeps the scones ultra-moist and tender.
- 1 large egg – Helps bind the dough and gives a soft texture.
- 1 tablespoon vanilla extract – Enhances the flavor beautifully.
- Zest of 1 large orange – Adds a natural citrusy kick.
- 2 tablespoons fresh orange juice – Intensifies the orange flavor.
Optional (but Highly Recommended!)
- ½ cup white chocolate chips – For a touch of sweetness.
- ½ teaspoon cinnamon – Adds warmth and depth.
How to Make the Best Orange Cream Scones
Making these Orange Cream Scones is easier than you think! Just follow these simple steps:
Step 1: Prep Your Ingredients
Before you start, preheat your oven to 400°F (200°C) and line a baking sheet with parchment paper. Cold ingredients are key! So keep your butter, egg, and cream in the fridge until you need them.
Step 2: Mix the Dry Ingredients
In a large mixing bowl, whisk together the flour, sugar, baking powder, and salt. This helps distribute the leavening evenly so your scones rise perfectly.
Step 3: Cut in the Butter
Take your cold, cubed butter and work it into the flour mixture using a pastry cutter or your fingers. You want the butter pieces to be about the size of small peas—this ensures a flaky, tender texture.
Step 4: Add the Wet Ingredients
In a separate bowl, whisk together the heavy cream, egg, vanilla extract, orange zest, and orange juice. Slowly pour this mixture into the dry ingredients and gently mix until combined.
👉 Pro Tip: Don’t overmix! The dough should be slightly shaggy but hold together when pressed.
Step 5: Shape and Cut the Scones
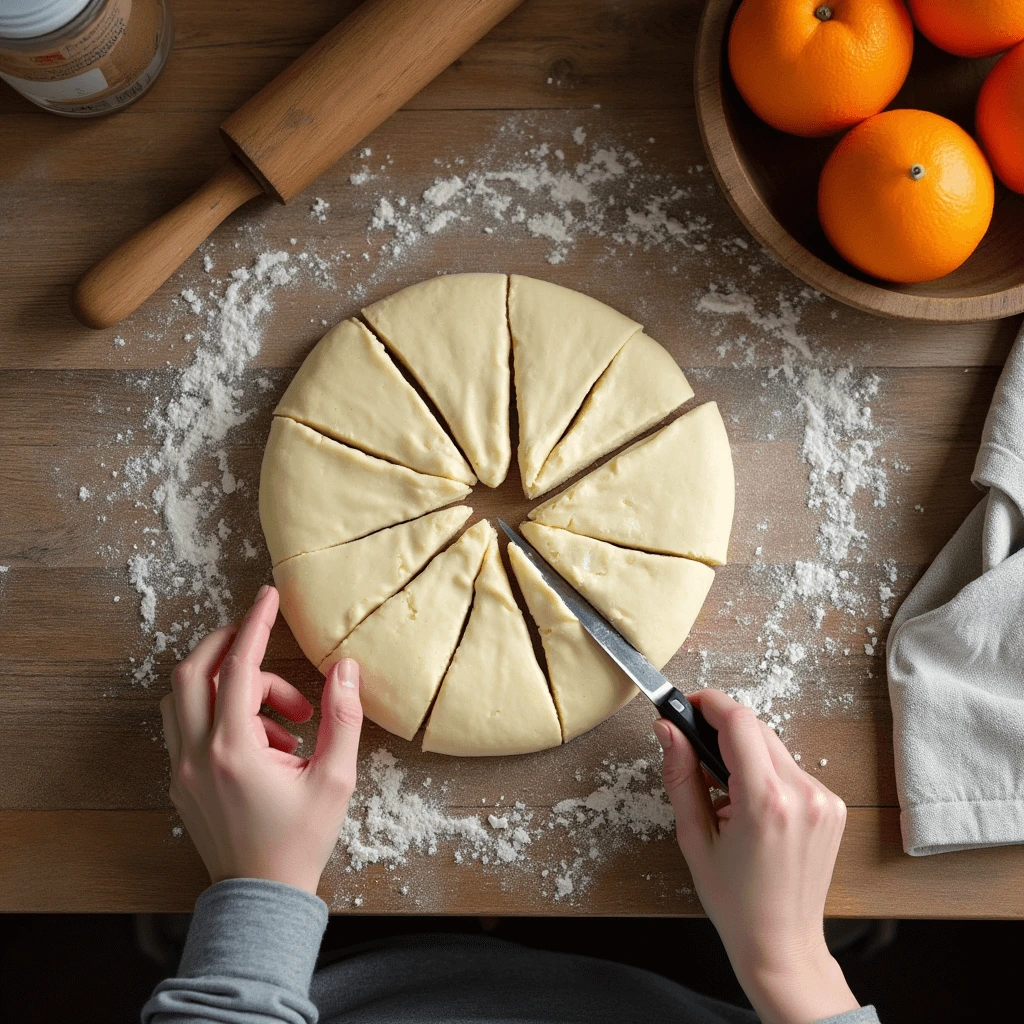
Lightly flour a clean surface and turn out the dough. Gently press it into an 8-inch circle, about 1-inch thick. Using a sharp knife, cut into 8 equal wedges.
Step 6: Bake Until Golden
Place the scones on the prepared baking sheet, spacing them about 2 inches apart. Brush the tops lightly with heavy cream and bake for 15-18 minutes or until golden brown.
Step 7: Cool and Glaze (Optional!)
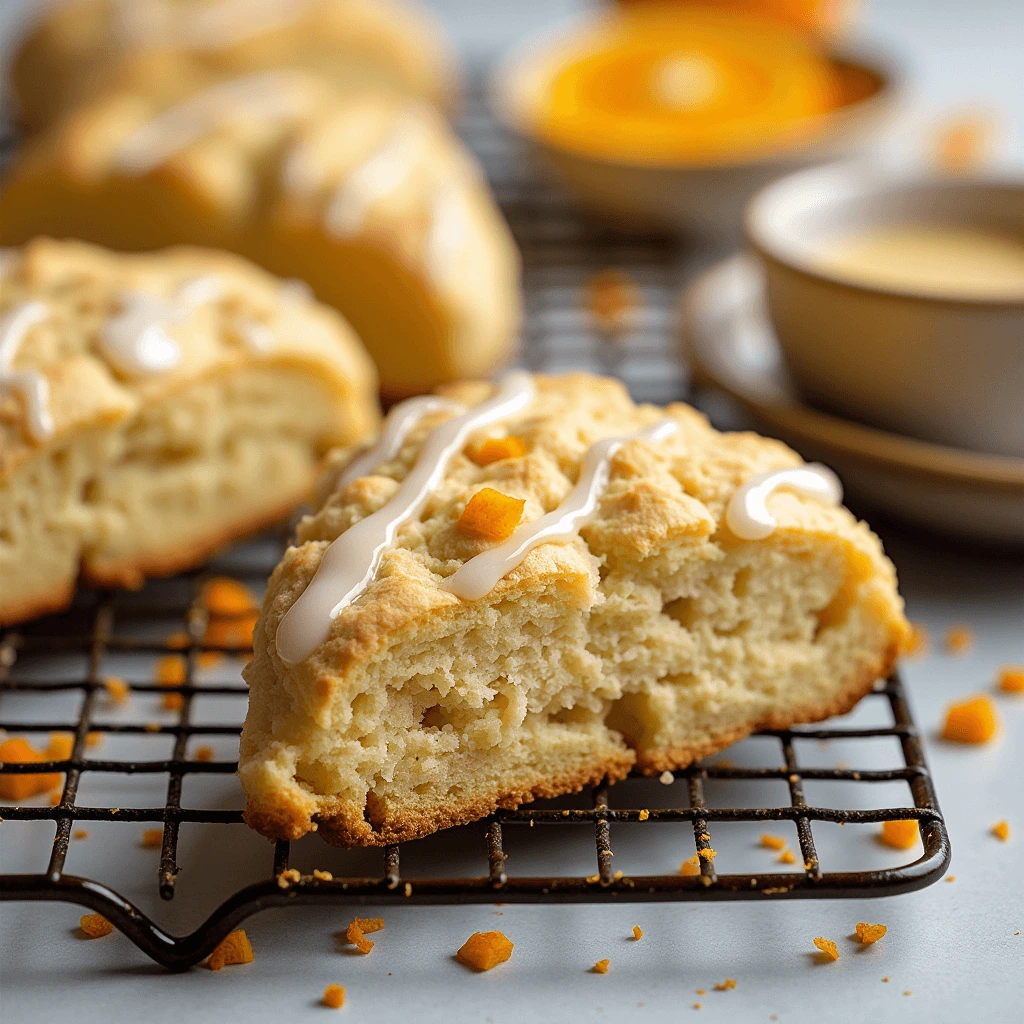
Let the scones cool for 10 minutes, then drizzle with a simple orange glaze:
Orange Glaze:
- 1 cup powdered sugar
- 2 tablespoons fresh orange juice
- ½ teaspoon vanilla extract
Whisk together until smooth, then drizzle over your warm scones.
Pro Tips for the Best Orange Cream Scones
💡 Keep the butter cold!
For the flakiest Orange Cream Scones, the butter needs to stay cold. The cold butter creates little pockets of air in the dough as it bakes, which results in that perfect flaky texture we all love. To achieve this, cut your butter into cubes and place them in the freezer for about 10 minutes before incorporating them into the dough. This step is essential for getting that tender, melt-in-your-mouth scone!
💡 Don’t overwork the dough!
One of the biggest mistakes people make when baking Orange Cream Scones is overmixing the dough. The more you mix, the more the gluten develops, which can lead to tough, dense scones. The key to a light, tender scone is to mix the ingredients just until they come together. It’s okay if the dough looks a little shaggy or lumpy—this will ensure your Orange Cream Scones are perfectly tender, not tough!
💡 Use fresh orange zest!
When it comes to flavor, fresh orange zest makes all the difference in your Orange Cream Scones! The zest contains oils that are packed with vibrant citrus flavor, which will elevate your scones. Avoid using pre-zested or dried orange peel, as it won’t provide the same level of flavor. A simple microplane grater is the best tool for zesting, and make sure to zest just the outer orange part—avoid the bitter white pith!
💡 Space them out on the baking sheet!
When placing your Orange Cream Scones on the baking sheet, make sure to leave enough room between each one. Scones need space to rise and spread properly, so give them about 2 inches of room. If they’re too close together, they won’t bake evenly, and you won’t get that beautiful, golden-brown crust on all sides. It’s worth the extra effort to space them out!
Variations & Customizations
Want to mix things up? Try these fun twists:
🔸 Chocolate Orange Scones – Add ½ cup dark chocolate chips.
🔸 Nutty Crunch Scones – Stir in ½ cup chopped pecans or almonds.
🔸 Cranberry Orange Scones – Fold in ½ cup dried cranberries for a tangy touch.
🔸 Healthier Version – Swap half the flour for whole wheat flour and reduce the sugar slightly.
How to Store & Freeze Orange Cream Scones
Storing:
To keep your Orange Cream Scones fresh and delicious, store them in an airtight container at room temperature. This will help preserve their tender, flaky texture. They can last up to 2 days, but we recommend enjoying them within the first day or two for the best taste. If you find that you have leftover scones, simply wrap them tightly in wax paper or plastic wrap before placing them in the container to keep them from drying out.
Freezing:
Freezing scones is a great option if you want to make them ahead of time! To freeze unbaked scones, place them on a baking sheet in a single layer, ensuring they are not touching. Pop the tray into the freezer and freeze until solid—this usually takes about 2 hours. Once they are completely frozen, transfer the scones to a freezer-safe bag or airtight container. When you’re ready to bake, you can cook them straight from the freezer. Just add a few extra minutes to the baking time, and you’ll have fresh, hot scones in no time!
Frequently Asked Questions
Can I make these scones without heavy cream?
Yes, absolutely! If you’re out of heavy cream or looking for a lighter alternative, you can substitute buttermilk or whole milk for the cream. Keep in mind, the texture of the scones may be slightly different, with a bit less richness and tenderness. But rest assured, the citrusy flavor from the orange zest and the sweet glaze will still make these scones irresistibly tasty.
Why are my scones dry?
If your scones turned out dry, the most common culprit is adding too much flour or overmixing the dough. It’s important to measure your flour accurately by spooning it into the measuring cup and leveling it off to avoid excess flour. Additionally, when mixing the dough, be gentle and stop as soon as the ingredients are combined. Overworking the dough can lead to dense, dry scones, so handle it with care to maintain that perfect flaky texture.
Can I make these ahead of time?
Definitely! If you’re preparing for a busy morning or a special event, you can make these scones ahead of time. Simply shape the scone dough, place the pieces on a tray, and cover them with plastic wrap or a damp towel. Refrigerate overnight to allow the flavors to meld and the dough to chill. In the morning, bake the scones fresh for a warm, comforting treat that will feel like it was just made!

Orange Cream Scones Recipe Card
- Total Time: 33 minutes
- Yield: 8 scones 1x
- Diet: Vegetarian
Description
These Orange Cream Scones are soft, buttery, and bursting with citrus flavor! Made with fresh orange zest and heavy cream, they’re perfectly tender and flaky. Whether you enjoy them plain, drizzled with an orange glaze, or paired with your favorite jam, they make an irresistible breakfast or tea-time treat
Ingredients
For the Scones:
- 2 ½ cups all-purpose flour
- ¼ cup granulated sugar
- 1 tablespoon baking powder
- ½ teaspoon salt
- ½ cup cold unsalted butter, cubed
- ¾ cup heavy cream, plus extra for brushing
- 1 large egg
- 1 tablespoon vanilla extract
- Zest of 1 large orange
- 2 tablespoons fresh orange juice
For the Orange Glaze (Optional):
- 1 cup powdered sugar
- 2 tablespoons fresh orange juice
- ½ teaspoon vanilla extract
Instructions
1️⃣ Preheat oven to 400°F (200°C) and line a baking sheet with parchment paper.
2️⃣ Mix the dry ingredients: In a large bowl, whisk together flour, sugar, baking powder, and salt.
3️⃣ Cut in the butter: Add the cold cubed butter and mix using a pastry cutter or your fingers until the mixture resembles coarse crumbs.
4️⃣ Combine wet ingredients: In a separate bowl, whisk together heavy cream, egg, vanilla, orange zest, and orange juice. Pour this into the dry ingredients and gently mix until a dough forms.
5️⃣ Shape the scones: Transfer the dough to a lightly floured surface. Pat it into an 8-inch circle, about 1 inch thick, and cut it into 8 equal wedges.
6️⃣ Bake: Place the scones on the baking sheet, spacing them apart. Brush the tops with a little extra heavy cream. Bake for 15-18 minutes, or until golden brown.
7️⃣ Make the glaze (optional): Whisk together powdered sugar, orange juice, and vanilla until smooth. Drizzle over warm scones.
8️⃣ Serve & enjoy!
Notes
✅ Use cold butter for the best flaky texture.
✅ Don’t overmix the dough—this keeps the scones soft.
✅ For extra crunch, sprinkle sugar on top before baking.
✅ Freeze unbaked scones for up to 2 months and bake when needed.
- Prep Time: 15 minutes
- Cook Time: 18 minutes
- Category: Breakfast, Dessert
- Method: Baking
- Cuisine: American
Final Thoughts on Orange Cream Scones
If you’re looking for a soft, flaky, and buttery scone with a bright citrus kick, these Orange Cream Scones are the perfect recipe to try. Whether you enjoy them plain or with a drizzle of glaze, they’re guaranteed to be a hit!
So what are you waiting for? Get baking and enjoy every warm, citrusy bite! 😍
For more delicious dessert recipes, check out this collection! 🍰✨